Table of Contents
Open Table of Contents
Introduction
Update: Honestly, just use Ludus.
Mayfly has already made a guide on installing GOAD on Proxmox. However, reading through the blog it seemed a bit too over complicated for my situation. For one, I have Proxmox installed in my homelab, so any NAT forwarding rules will be unnecessary to reach any of the internal boxes. I don’t mind if some of my VMs are directly connected to my home network, and I also don’t really care too much about proper firewall rules implementation and just want things to “work”.
Therefore, many of the steps will be similar to Mayfly’s guide, but with my own twist to suit my own situation.
Network diagram
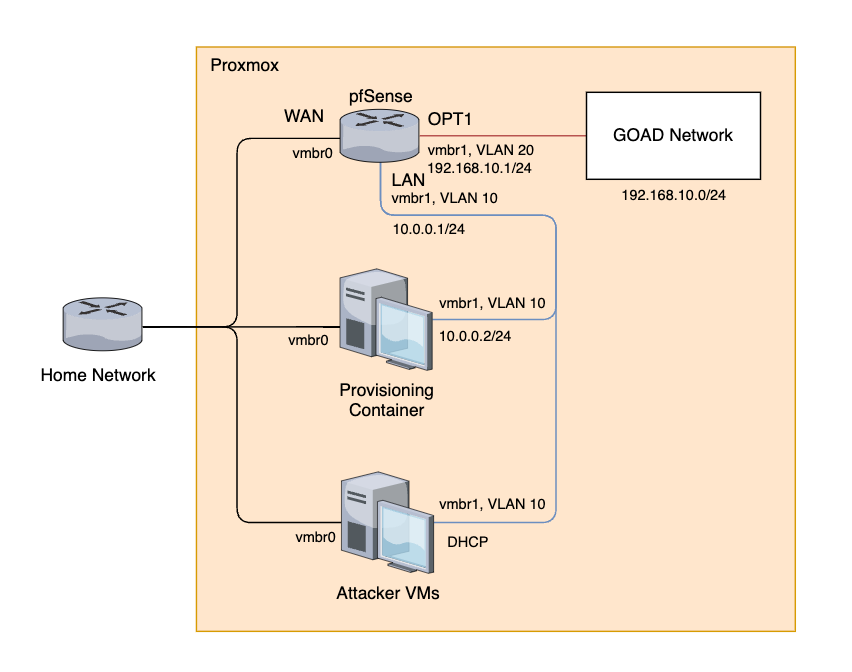
The pfSense will allow us to create two segmented networks - one specifically for GOAD and the other for any other VMs we want to have access into GOAD, like attacker VMs and the provisioning container.
The provisioning container will contain the GitHub repo for GOAD and will create templates with Packer, create GOAD VMs with Terraform, and configure the GOAD VMs with Ansible. Therefore it will need to interact with the Proxmox’s API as well as the VMs in the GOAD network.
Install Proxmox
I won’t cover the exact steps on installing Proxmox onto a bare metal machine, but you can refer to the documentation on the steps.
I left most settings as default, such as the node’s name being pve. In this blog I’ll refer to my node name as pve, but if you choose to customize your node’s name then be sure to replace pve with your own value.
Setting up Proxmox
Once logged into Proxmox, on “Server View”, navigate to Datacenter -> pve -> System -> Network and add the 3 following devices:
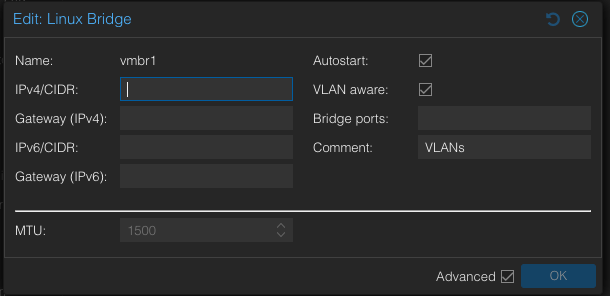
Linux Bridge for VLANs
- Create -> Linux Bridge
- Ensure that the name is
vmbr1 - VLAN aware: yes
- Comment: “VLANs”
- Ensure that the name is
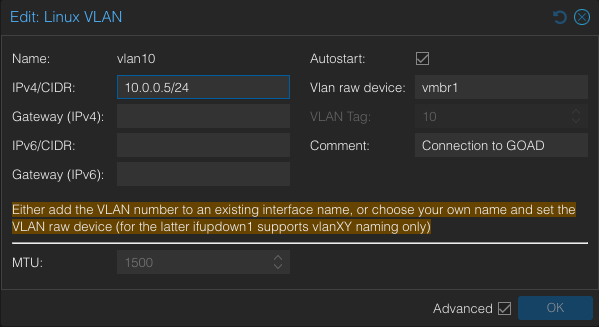
VLAN 10
- Create -> Linux VLAN
- Name:
vlan10 - IP/CIDR:
10.0.0.5/24 - VLAN raw device:
vmbr1 - Comment: “Connection to GOAD”
- Name:
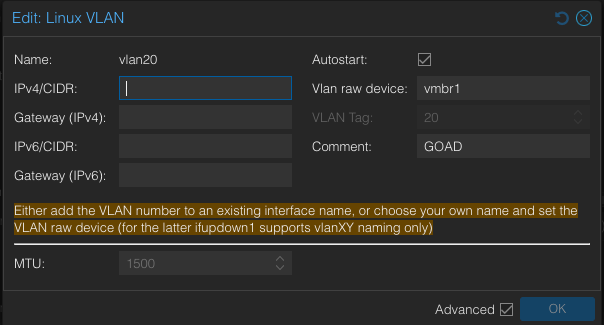
VLAN 20
- Create -> Linux VLAN
- Name:
vlan20 - VLAN raw device:
vmbr1 - Comment: “GOAD”
- Name:
Click on “Apply Configuration”.
Downloading required ISOs
We will need to get the following ISOs onto Proxmox:
- pfSense
- Windows Server 2019
- Windows Server 2016
We can use the “Download from URL” option to tell Proxmox to download the ISOs directly.
pfSense
For pfSense, use the following info:
- URL:
https://repo.ialab.dsu.edu/pfsense/pfSense-CE-2.7.2-RELEASE-amd64.iso.gz - File name:
pfSense-CE-2.7.2-RELEASE-amd64.iso.gz
You can use the “Query URL” button to automatically populate the file name for this ISO.

Windows Server 2016 and 2019
For Windows Server 2019, use the below info:
- URL:
https://software-download.microsoft.com/download/pr/17763.737.190906-2324.rs5_release_svc_refresh_SERVER_EVAL_x64FRE_en-us_1.iso - File name:
windows_server_2019_17763.737_eval_x64.iso
IMPORTANT! Make sure that the name of this file is exactly as shown. Don’t click on the Query URL button!
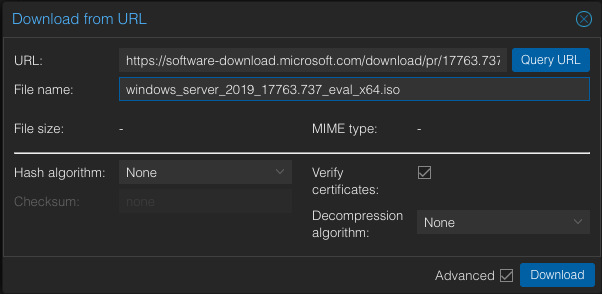
Repeat the steps for Windows Server 2016:
- URL:
https://software-download.microsoft.com/download/pr/Windows_Server_2016_Datacenter_EVAL_en-us_14393_refresh.ISO - File name:
windows_server_2016_14393.0_eval_x64.iso
After a couple of minutes, you should see the three ISOs.
Setting up pools
Go to Datacenter -> Permissions -> Pools and create the following pools:
- VMs
- GOAD
- Templates

Setting up pfSense VM
Creating the VM
Create a new pfSense VM with the following settings:
- Name: pfSense
- Resource Pool: VMs
- ISO image: Select the pfSense ISO
- Disk size: 32 GB
- Cores: 2
- Memory (RAM): 1 GB
- Network:
vmbr0 - Confirm
Once VM is completed, add a network:
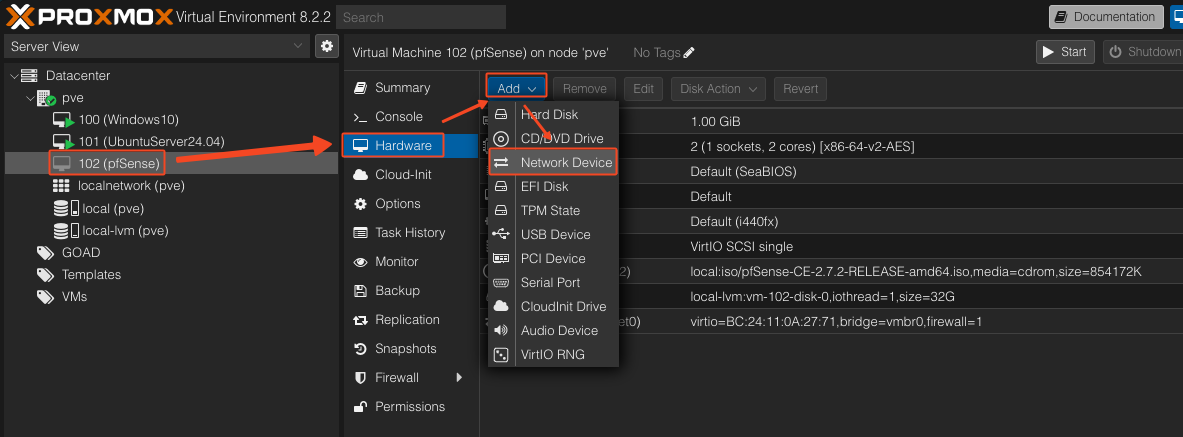
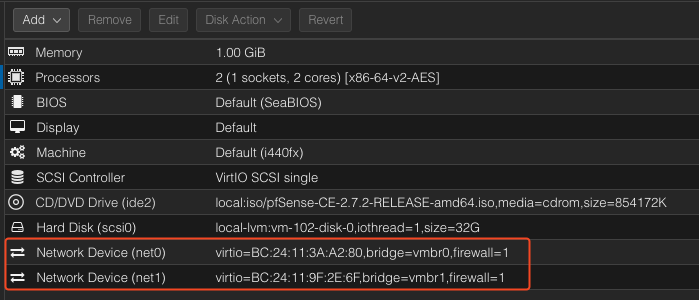
We should see something like this:
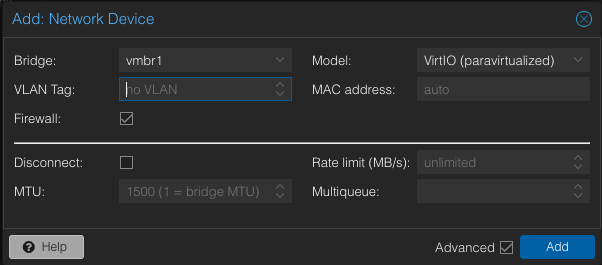
Select the bridge as vmbr1 and leave the VLAN tag blank. We will configure VLANs through pfSense.
Start the VM. You can access the console through the “Console” tab, or by double-clicking the VM name.
Accept the first menu and then select “Install” to install pfSense.
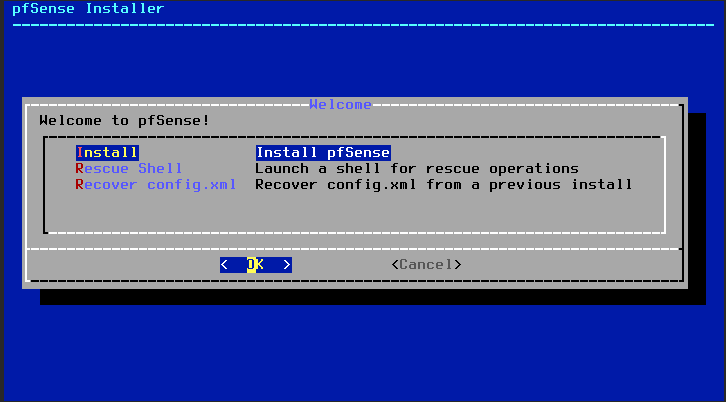
I selected “Auto (ZFS)“.
On the ZFS configuration page, keep hitting Enter until you see this:
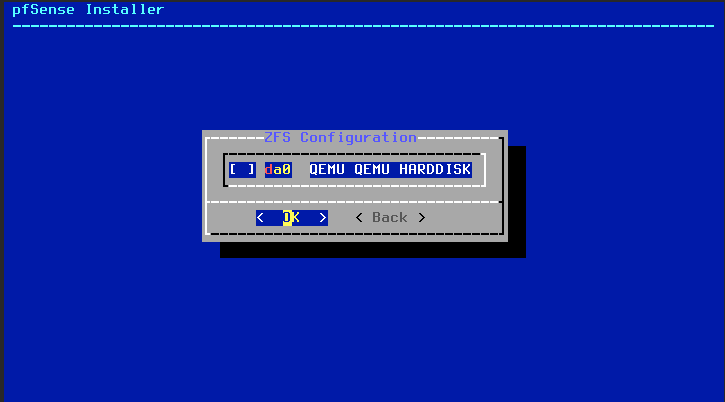
Hit Space to select the disk, and then hit Enter again. Select “YES” to confirm, then hit Enter. Reboot the system once installation is complete.
When the console asks “Should VLANs be set up now?” hit Y.
For the parent interface name, type vtnet1.
For the VLAN tag, type in 10.

Repeat the same process, but set the VLAN tag to 20.

Then hit Enter to finish VLAN configuration.
Configure the interfaces as follows:
- WAN interface name:
vtnet0 - LAN interface name:
vtnet1.10 - OPT1 interface name:
vtnet1.20
Then hit Y to confirm.
Once the pfSense reboots, we are greeted with the console menu.
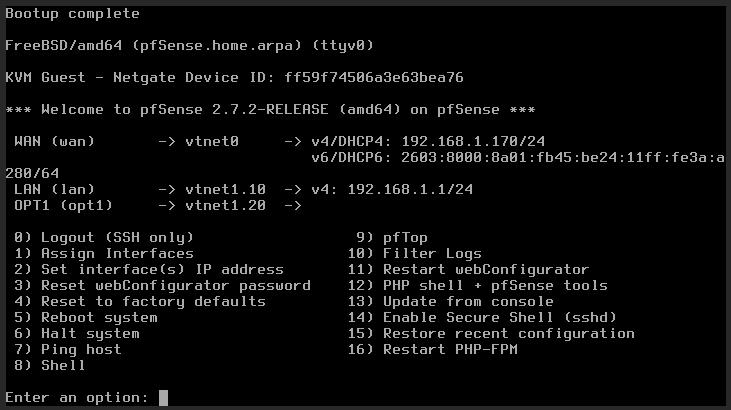
Configuring pfSense interfaces
Let’s perform some more configuration on the interfaces.
LAN
- Select “2” to configure interface IP addresses.
- Select “2” to configure LAN’s IP address.
- Select “n” on the DHCP question so that we don’t use DHCP.
- For the LAN IPv4 address, use
10.0.0.1/24. - Hit Enter to not use an upstream gateway.
- Select “n” to not use DHCPv6.
- Leave IPv6 blank.
- Select “y” to set up DHCP server on LAN.
- Start range:
10.0.0.100 - End range:
10.0.0.254 - Hit “n” to not revert to HTTP.
OPT1
- Select “2” to configure interface IP addresses.
- Select “3” to configure OPT1’s IP address.
- Select “n” on the DHCP question so that we don’t use DHCP.
- For the LAN IPv4 address, use
192.168.10.1/24. - Hit Enter to not use an upstream gateway.
- Select “n” to not use DHCPv6.
- Leave IPv6 blank.
- Select “y” to set up DHCP server on LAN.
- Start range:
192.168.10.100 - End range:
192.168.10.254 - Hit “n” to not revert to HTTP.
We should see something like this now:

Configuring firewall rules
To access the pfSense’s web GUI, we can use SSH tunneling to access pfSense’s port 443 from the Proxmox host.
ssh -L 8080:10.0.0.1:443 root@PROXMOX-IPOnce SSH’d in, navigate to https://localhost:8080 on your browser.
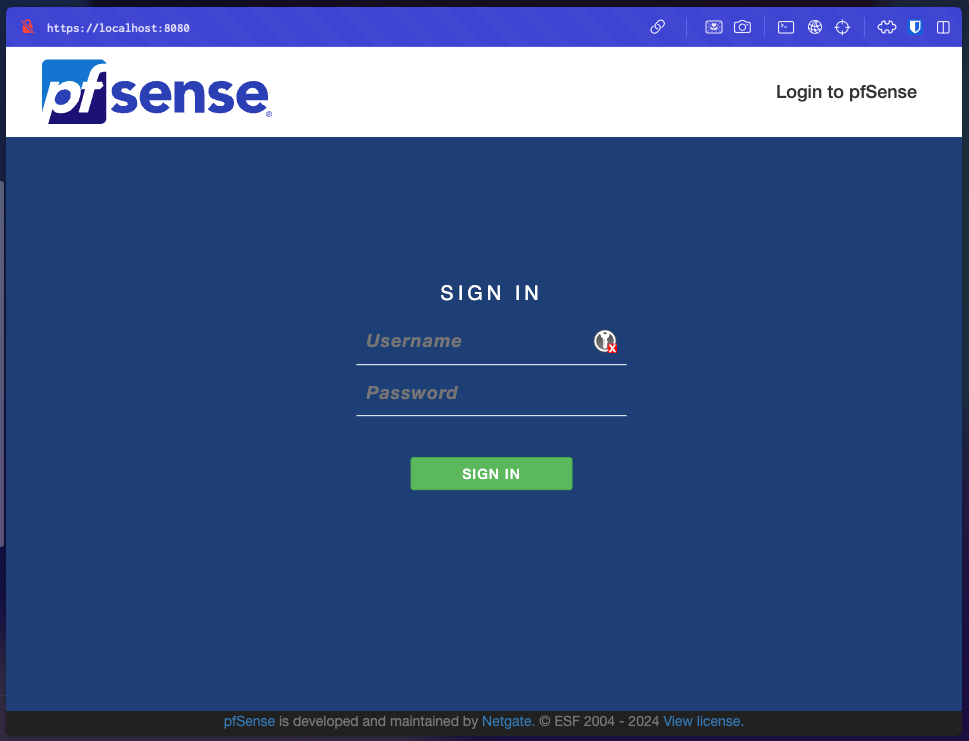
Log in with default credentials admin:pfsense.
Keep hitting “Next” until you get to the “Configure WAN Interface” step. Uncheck both “Block RFC 1918 Private Networks” and “Block bogon networks”.
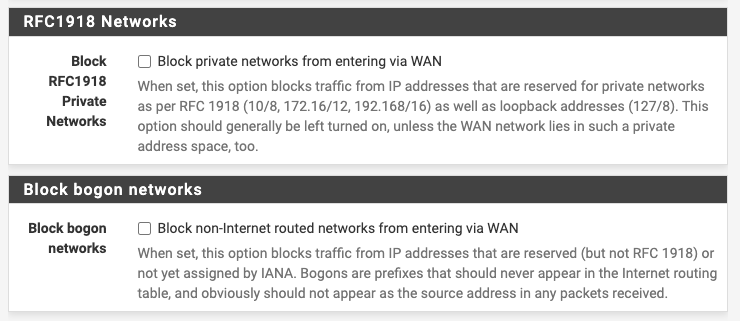
Keep hitting next until you get to the “Set Admin WebGUI Password”. Change the password to something more secure.
Then at the last step, click “Reload”.
Go to Firewall -> Rules -> OPT1 and add a new rule:
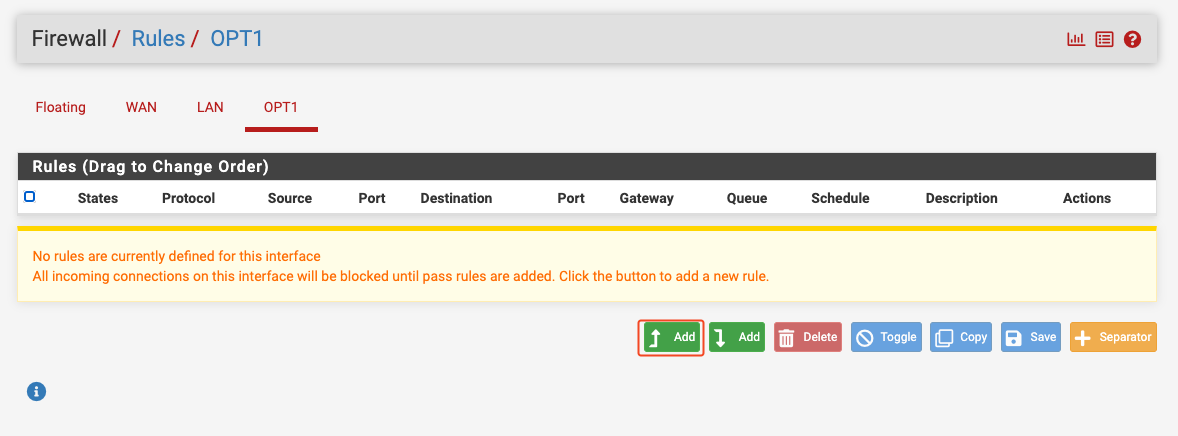
Ensure that the following settings are applied to this rule:
- Action: Pass
- Interface: OPT1
- Protocol: Any
- Source: OPT1 subnets
- Destination: Any
Configuring DNS
Under System -> General Setup, add a public DNS server like 1.1.1.1:

Set up provisioning container
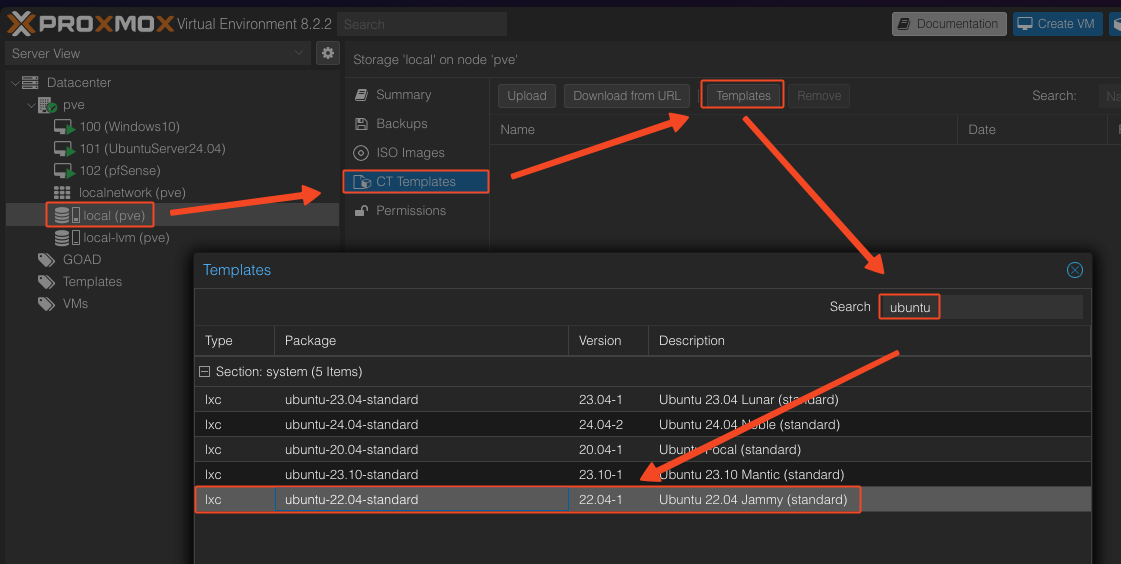
First, we download the CT template from Proxmox by going to the “local” storage -> CT Templates -> Templates -> Search “ubuntu” -> Select Ubuntu 22.04.
Create a new CT. Set the hostname to provisioning and set up an SSH password and key if you want.
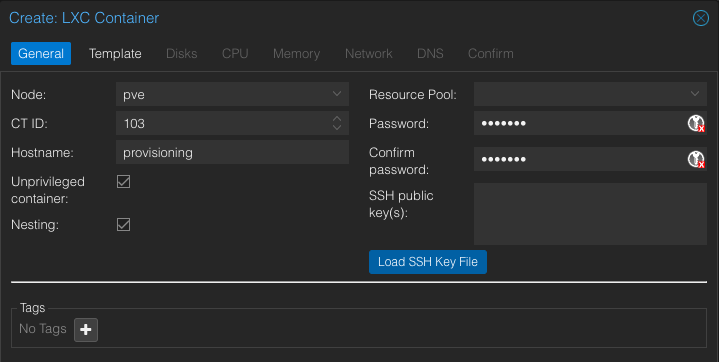
Set the template to the Ubuntu 22.04 image you just downloaded.

I set my disk size to 20 GB, CPU size to 2 cores, and RAM to 1 GB.
My network settings are as follows:
- Name:
eth0 - Bridge:
vmbr1 - VLAN Tag: 10
- IPv4: Static
- IPv4/CIDR:
10.0.0.2/24 - Gateway:
10.0.0.1

And then confirm.
Post-creation, I added a new network device so that I can directly SSH to it from my home network:
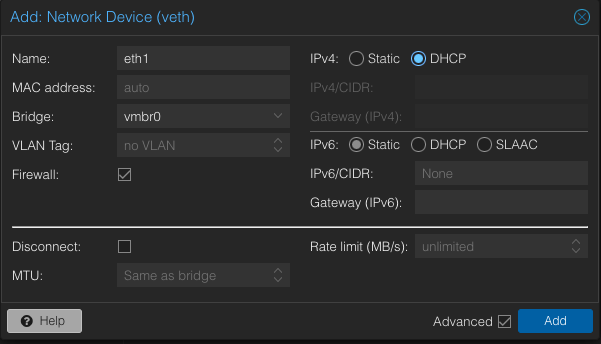
Let’s start this container. We can double click the container to access the terminal or SSH into it.
Run the following command:
apt update && apt upgrade
apt install git vim gpg tmux curl gnupg software-properties-common mkisofs vim
If you can’t hit the Internet, you can edit your DNS settings on the container.
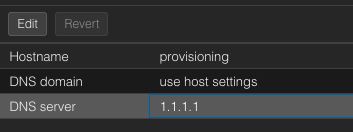
Installing Packer
Packer is a tool to create templates from configuration files. We will be using Packer to create Windows Server 2016 and 2019 templates.
wget -O- https://apt.releases.hashicorp.com/gpg | sudo gpg --dearmor -o /usr/share/keyrings/hashicorp-archive-keyring.gpg
echo "deb [signed-by=/usr/share/keyrings/hashicorp-archive-keyring.gpg] https://apt.releases.hashicorp.com $(lsb_release -cs) main" | sudo tee /etc/apt/sources.list.d/hashicorp.list
sudo apt update && sudo apt install packer
Run the following to confirm that Packer has been installed:
packer -v
Installing Terraform
Terraform is a tool to create infrastructure (such as VMs) from configuration files. We will be using Terraform to deploy the Windows Server VMs.
# Install the HashiCorp GPG key.
wget -O- https://apt.releases.hashicorp.com/gpg | \
gpg --dearmor | \
tee /usr/share/keyrings/hashicorp-archive-keyring.gpg

# Verify the key's fingerprint.
gpg --no-default-keyring \
--keyring /usr/share/keyrings/hashicorp-archive-keyring.gpg \
--fingerprint

# add terraform sourcelist
echo "deb [signed-by=/usr/share/keyrings/hashicorp-archive-keyring.gpg] \
https://apt.releases.hashicorp.com $(lsb_release -cs) main" | \
tee /etc/apt/sources.list.d/hashicorp.list

# update apt and install terraform
apt update && apt install terraform
Run the following to confirm that Terraform has been installed:
terraform -v
Installing Ansible
Ansible is an automation tool used to configure batches of machines from a centralized server. We will be using Ansible to configure the GOAD vulnerable environment.
apt install python3-pip
python3 -m pip install --upgrade pip
python3 -m pip install ansible-core==2.12.6
python3 -m pip install pywinrm
Run the following commands to confirm that Ansible and Ansible Galaxy have been installed:
ansible-galaxy --version
ansible --version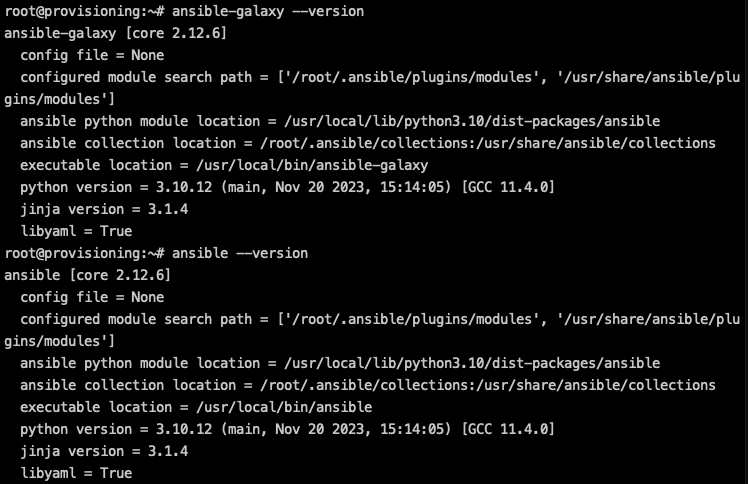
Cloning the GOAD project
Next, clone GOAD from GitHub.
cd /root
git clone https://github.com/Orange-Cyberdefense/GOAD.git
Creating templates with Packer
First, we download cloudbase-init on the provisioning container:
cd /root/GOAD/packer/proxmox/scripts/sysprep
wget https://cloudbase.it/downloads/CloudbaseInitSetup_Stable_x64.msi
We then create a new user on Proxmox dedicated for GOAD deployment:
# create new user
pveum useradd infra_as_code@pve
pveum passwd infra_as_code@pve

# assign Administrator role to new user lol
pveum acl modify / -user 'infra_as_code@pve' -role Administrator
Editing HCL configuration files
On the provisioning container, copy the config file.
cd /root/GOAD/packer/proxmox/
cp config.auto.pkrvars.hcl.template config.auto.pkrvars.hcl
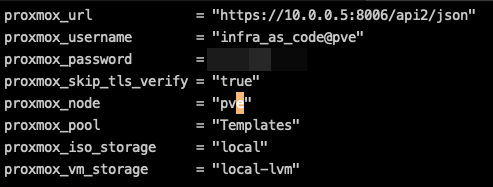
Edit the configuration file with the password of the infra_as_code user, as well as the other variables if necessary.
Preparing the ISO files
cd /root/GOAD/packer/proxmox/
./build_proxmox_iso.sh
This will create the ISO files that will be used by Packer to build our templates. The ISO files contain the unattend.xml files that will perform auto configuration of the VMs to be used as templates.
On Proxmox, use scp to copy over the ISO files to Proxmox.
scp root@10.0.0.2:/root/GOAD/packer/proxmox/iso/scripts_withcloudinit.iso /var/lib/vz/template/iso/scripts_withcloudinit.isoWhile on Proxmox, download virtio-win.iso, which contain the Windows drivers for KVM/QEMU.
cd /var/lib/vz/template/iso
wget https://fedorapeople.org/groups/virt/virtio-win/direct-downloads/stable-virtio/virtio-win.iso
Afterwards, we can check that the ISOs are downloaded properly:
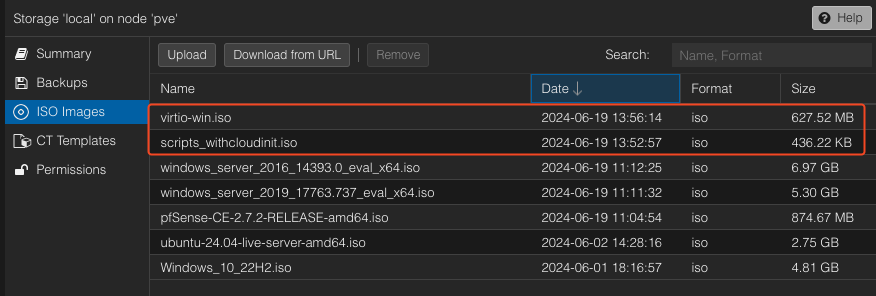
Modifying Packer configuration files
Modify packer.json.pkr.hcl. On line 43, change vmbr3 to vmbr1, as well as vlan_tag to 20:

Modify windows_server2019_proxmox_cloudinit.pkvars.hcl so that vm_disk_format is set to raw, and ensure that the ISO name matches with the one downloaded onto Proxmox:
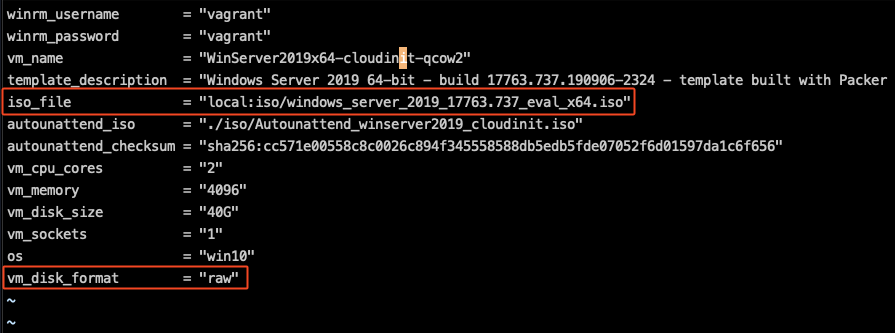
Do the same for windows_server2016_proxmox_cloudinit.pkvars.hcl.
Running Packer
Run Packer against the Windows Server 2019 image:
packer init .
packer validate -var-file=windows_server2019_proxmox_cloudinit.pkvars.hcl .
packer build -var-file=windows_server2019_proxmox_cloudinit.pkvars.hcl .
It takes a while for the VM to be set up.
Afterwards, run Packer for Windows Server 2016:
packer validate -var-file=windows_server2016_proxmox_cloudinit.pkvars.hcl .
packer build -var-file=windows_server2016_proxmox_cloudinit.pkvars.hcl .
Note: The template will be configured to use the French keyboard by default
Creating GOAD VMs with Terraform
Now, let’s use Terraform to build out the VMs for our environment.
On the provisioning box, make a copy of the variables.tf:
cd /root/GOAD/ad/GOAD/providers/proxmox/terraform
cp variables.tf.template variables.tf
We change the following variables:
pm_api_url:https://10.0.0.5:8006/api2/jsonpm_password: the password to theinfra_as_codeuserpm_node: name of nodepm_pool: leave as GOADstorage:local-lvmnetwork_bridge:vmbr1network_vlan: 20
Also be sure to change the IDs of the templates (may be different depending on how many VMs you had before):
WinServer2019_x64: 104WinServer2016_x64: 105
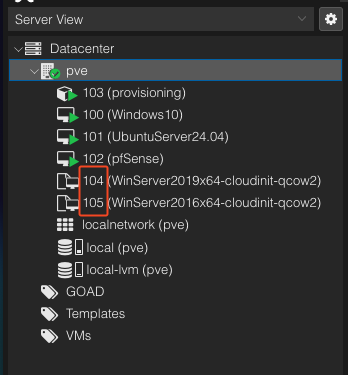
Running Terraform
Run Terraform with the following commands. This will create 5 new Windows VMs for GOAD.
terraform init
terraform plan -out goad.plan
terraform apply "goad.plan"
Configuring GOAD with Ansible
Now, what is left to do is to run Ansible.
cd /root/GOAD/ansible
ansible-galaxy install -r requirements.yml
export ANSIBLE_COMMAND="ansible-playbook -i ../ad/GOAD/data/inventory -i ../ad/GOAD/providers/proxmox/inventory"
../scripts/provisionning.sh # yes the file name is misspelled...
This can take a couple hours.